The ZEBRA:
Suspension, Tires, and Wheels
One of the Base Vehicle strong points for ZEBRA is the suspension and axles-super heavy duty- so it was left as stock 404, with the exception of removal of the rear helper springs. Other items addressed include new shocks - Monroe Van-Magnum (B11COO)- replacing the worn old units. New steering stabilizer and track rod bushings, and all suspension hardware replaced. Suspension modifications may be made after having field-tested the rig more completely.
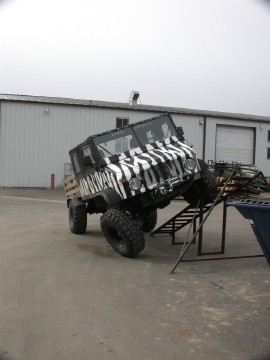
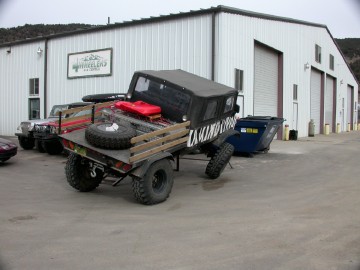
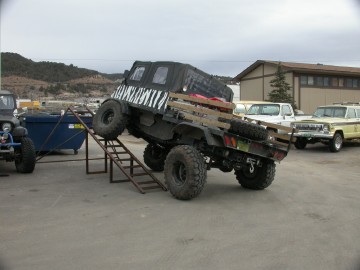
For preliminary testing of suspension and tire interference while building the truck, I would drive it through a 2-foot deep irrigation ditch. Prior to having the rear bed and fuel tank constructed, one rear wheel would leave the ground. The same maneuver with the bed and (near empty) fuel tank in place would keep all four wheels firmly planted. So the springs are too stiff if you're running bare frame in the rear. Additionally, my 38" (36
1/2" actual) TSL radials just cleared my fenderless front wheel openings. On a 20' ramp test, with about 15 gallons of fuel in the tank and very little trail gear on board, I scored a respectable RTI of 823. I suspect more gear and fuel would keep the one rear tire from lifting, although I can attest that the coil springs were plenty maxed out. Tire interference never became an issue on the ramp, so I'm glad I took the necessary precautions ahead of time.
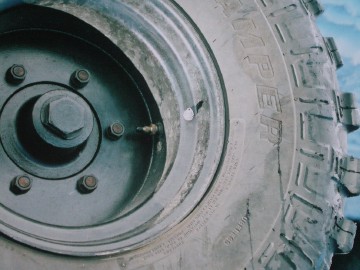
Wheels are custom Stockon 16.5" x 9.75" with 4.5" backspacing and given the POR-15 treatment. Tires are 38" Interco TSL radials. A friend of mine has a tire-grooving tool so I will be modifying the tread some to add more bite, but so far I've been very happy with them. Especially during my Cottonwood Pass mud run. The truck seems comfortable at 50-55 mph with this tire size and plenty more throttle left but I plan on getting some taller tires for the stock 20"x9" wheels to get me to farther trails in the future. This will require wheel changes at the trailhead though.
Here's a trick item for you guys - I'm also running DOT approved dual beadlocks with runflats! These are a Swedish product called Tireloc's that are a Pneumatic dual beadlock by way of an inner tire liner with tube. Air up the tube and it locks BOTH beads in place as well as acting as a runflat. The only tell tale sign is an additional valve stem on the wheel. They were, or have by now, developed them for 20" and 24" wheels, so you may want to give them a call or look them up on the Net. Be forewarned, they can be spendy.
How do they work in the field? Don't know. I don't have an air compressor on board yet so I have not been airing down on the trail. I can tell you this, it took us almost 1-1/4 hours to mount four, using a tire mounting machine, taking us progressively less time as we gained experience. Tireloc recommends mounting the tires by hand. One of the four tires went flat after two days but tightening the valve stem solved that in a jiffy. Another point of note, Tireloc suggests installing the new stem in line with the other, or slightly offset. I mounted mine in line and 'almost' had a lug nut interference problem. And I'll know soon, when I have the wheels balanced, if they should actually be 180' opposite each other.
Suspension, Tires, and Wheels - Update 2006
When fully geared up, and fully articulated, I have noticed very slight tire-fender
contact in both the front and the rear. Not enough to want to go ahead and lift the
cab and bed, but enough to not want to go to a taller tire. Any contact will certainly
not damage the wheel openings, as all of them are solid steel,. The rear tubs are
forgiving enough to take the slight contact in stride, and the front flares have
no sign of damage. So I'll just keep an eye out on this for the time being.
RTI.3.jpg
RTI.2.jpg
RTI.1.jpg
I have also mounted some tires on the stock 9x20 wheels. Going to this tire/wheel
package and removing the fenders makes me a full 10 narrower! I noticed also a
much greater choice of lines to take when off-road. But, the cost is ride comfort
and traction.
The aired down Swampers would significantly smooth out small trail irregularities,
and completely swallow rocks and hook up very well. Maybe too well. All four tires
have at least two or three side lugs torn half, or completely off from a combination
of not wanting to let go, and having a lot of weight to move. The narrow tires, even
aired down, would not be as smooth, and often would slip off rocks, changing my line.
When aired up they offered poor traction in mud, but bettered when taken down to 12
psi. The change in off-road performance from one tire to the other, as expected, is
huge. I keep one of the narrow tires on board as a spare since it is thinner, lighter,
and still full size. Mounted with the dish of the wheel up, and with a cover made of
18g sheet metal, it serves as a nice storage area for a tow strap and canvas tarp. I
can also stack two for extra long and/or brutal trips.
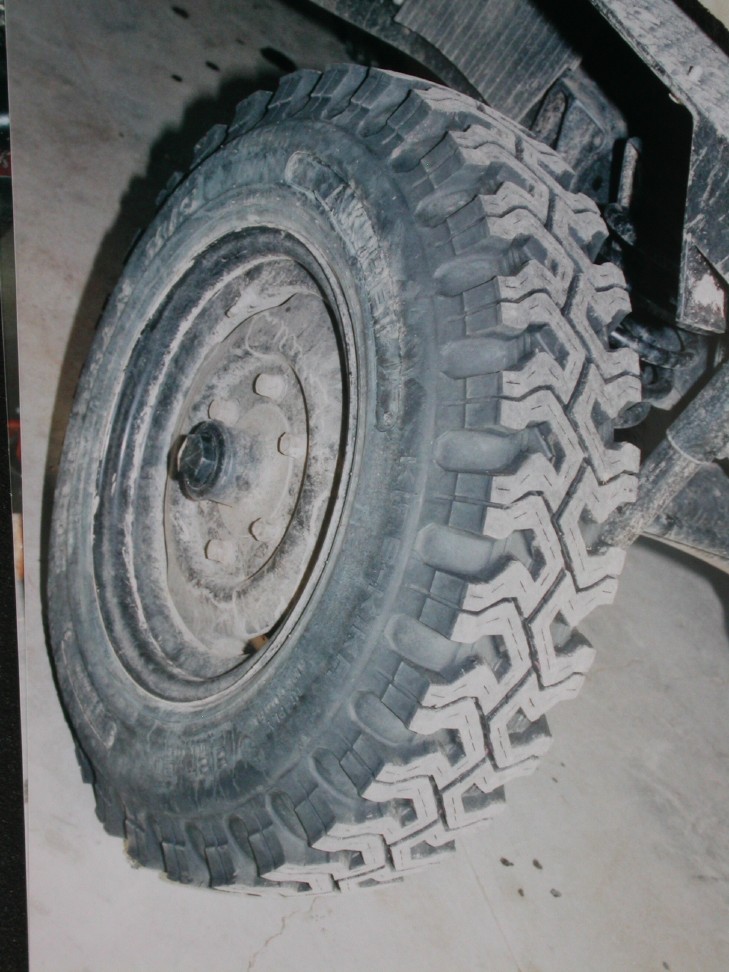
The 9x20 inch tires, since many of you would like to know, are Akuret 8.25x20 Supertrack
M/S. They have an extra thickness of rubber along the sidewall, and again near the rim
to resist curb abrasion and hence also have molded into the sidewall the letters
KURB KIKR, and Rim Guard. Designed, I guess, for those who can't drive, but useful
for the rocks. Having heard that mounting these would be a bear, I initially just
bought one, brought it home and began to struggle to mount it. After about 45 minutes
of not being successful at putting the tire on the rim, I decided to try mounting the
rim on the tire. You would think that there is no difference in the sequence,
but using the latter approach, I was able to get it on first try. This convinced me
that trail repairs would not pose any problems, so a full set was bought and mounted
at the tire store, by the pros, with their labor saving devices.
skinny.tires.jpg
stockton.wheel.jpg
The TireLoc Pneumatic beadlocks on the wide set of wheels are SWEET! I have not had
any problems at all with them. They don't leak, don't slip, and don't need maintenance.
Last I wrote about these I had not yet tested them due to the fact that I had not yet
acquired an air compressor. But I have one now. Its an Extreme Aire, 100% duty 12 volt
compressor capable of producing 150psi. Add to that a 5 gallon air tank integrated
within the sealed roll cage and airing up is not too time consuming. More on the
roll cage in its own section elsewhere herein.
Next: Steering
-
|
